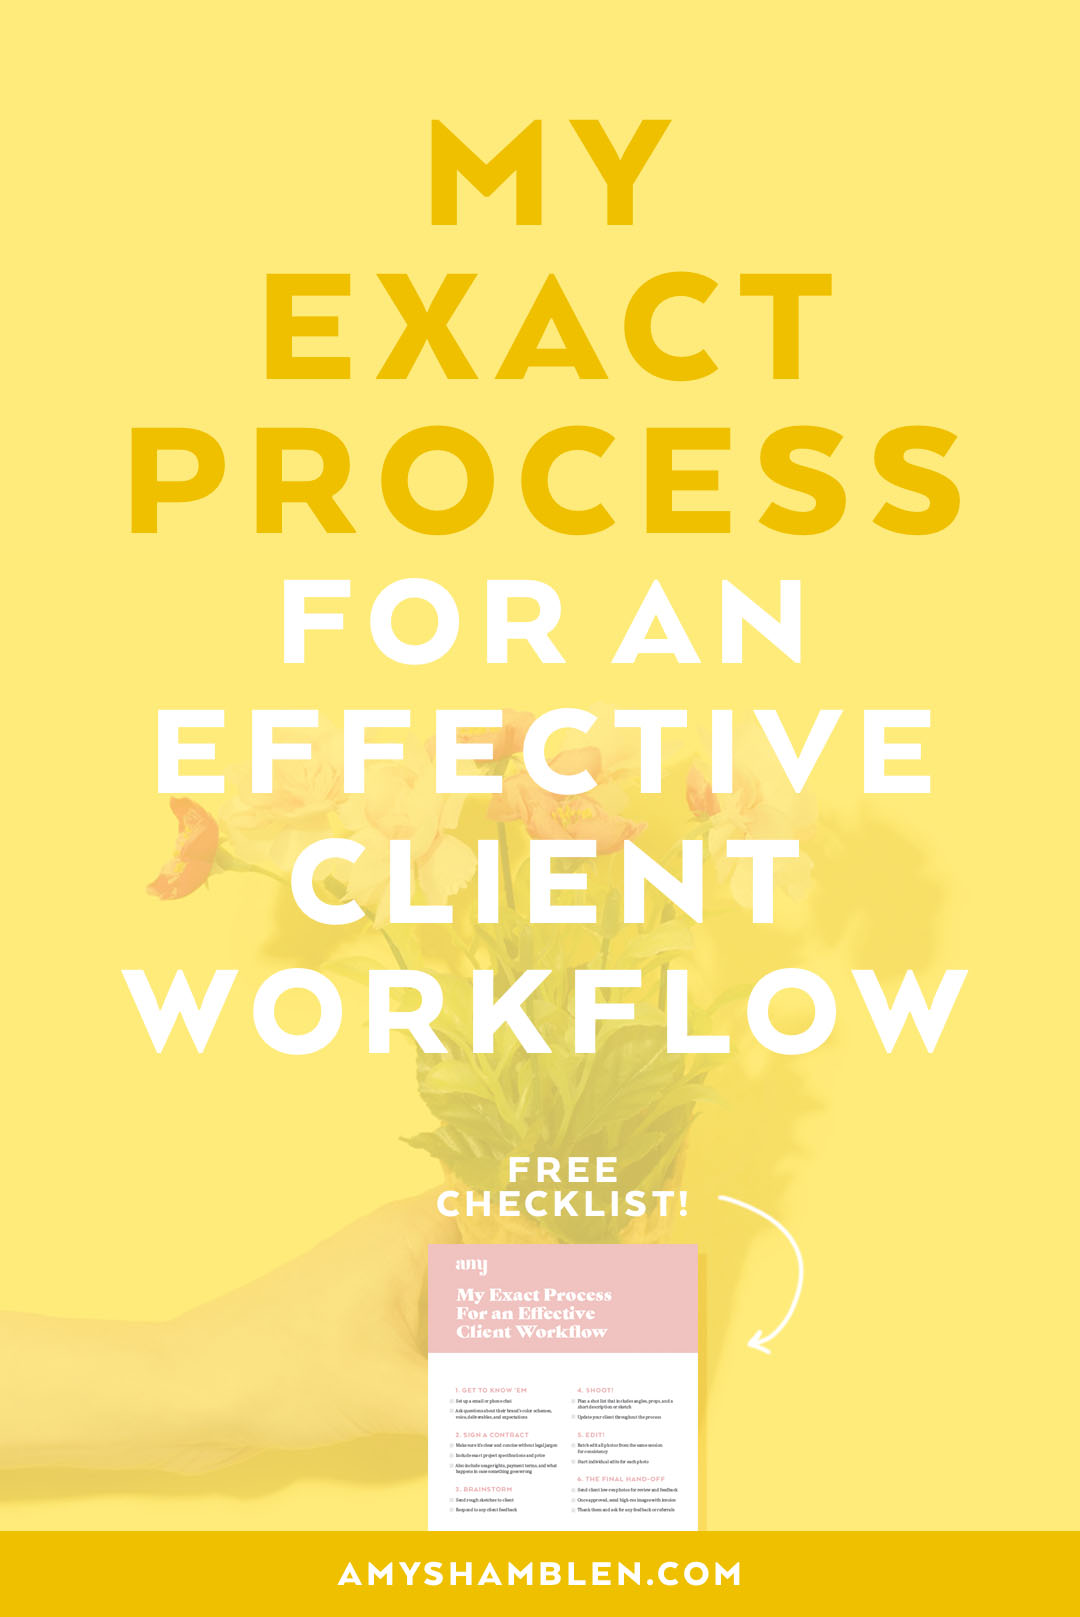
My Exact Process For an Effective Client Workflow

 When it comes to my client workflow, I always have an outlined list of steps I need to perform in order to make sure everything runs smoothly. When I first started my freelance life, I didn't have any process I followed. I would just kinda wing it day by day, but I quickly learned that wasn't best for me or my client. Sure, I was able to finish everything on time (with LOTS of hustle), but it left me feeling so stressed. I'm not able to create my best work if I'm super stressed out, so I knew I had to find a way to solve this problem.I've been working on refining my client workflow over time and have finally found a solution that works for me and my clients. By streamlining everything from consultation to final image delivery, it helps me stay organized, focused, and save time. I also include my client every step of the way so they're left feeling happy about the investment they made. Talk about a win-win!
Read on to learn about how I approach every project!
1. Get to know 'em
Once a potential client reaches out, the first goal of my client workflow is to listen to them, get to know them, and what they're all about. This is usually done through email, but I also do phone consultations if the client chooses. Since I'm extremely custom with my work, that means discussing their brand's color schemes, voice, deliverables, and so on. Not only is this great to help inspire ideas, but it also ensures that whatever I create will be spot-on with their brand.I also review with my client any expectations or desires they have for a project. It is important to have that discussion with them so you can build a relationship and make sure you have a good idea of what they have in mind for a project.Time saving tip: it helps to have email templates written out ahead of time with specific questions that will make it easier for them to chat about their brand.
2. Sign a contract
A MUST for your client workflow! I know too many creatives that have made work without a contract and ended up not getting paid! A contract isn't just for a legal agreement of payment though—it also builds trust and a reputation for yourself. By presenting a contract, you're showing your client that you take your work seriously. A contract outlines everything that should be done and protects us both. It also removes uncertainty, in case something were to go wrong with the project.A good contract should be clear and concise and cover what your client can do with your work, payment options and terms, what happens if the client is unhappy with your work, and any late fees. It doesn't have to have legal jargon, keep it simple so both parties can clearly understand it.My contract, in plain English, states:• I still own my work and that the client has the license to use it.• Exact specifications for the project, including price.• My payment terms are 30 days with a 2% interest for late payments.• If the client is unhappy with my work or decides to go in another direction, I will still be paid for my time up to that point and will terminate the contract.These are some of the most important parts of a contract. Writing one up can be dull and—quite frankly, BORING—and I hope by sharing exactly what's in my contract, it'll help you with yours. Check out the checklist below to keep all these important details handy with you!
3. Brainstorm
Once I get the contract signed and returned to me, then I begin brainstorming ideas. I make a PDF of digital sketches and send it back to the client later that day or the next day. By keeping the turnaround quick here, it gives my client time to review and give any feedback if they wish.I know a lot of other photographers who sign the contract and begin shooting immediately. While this isn't a bad thing, I personally prefer to have a discussion with my client in order to serve them best. I like to involve my client every step of the way. This is how I would always handle my design clients, and I treat my photography clients no different. By sending these sketches, the client knows what to expect and can be more involved in the process. Yes, it is more work on my end—but I keep my process thorough because I respect the investment they're making.The only exception to this rule is for monthly photography. We discuss the aesthetics of their brand beforehand and stay within that range each month so the client can have a steady flow of images without all the back-and-forth.
4. Shoot!
Before I actually start the shoot, I plan a shot list. This list always includes the colors, angles, props, and a short description. I usually include a quick sketch as well, since I'm visual person and like to see my composition beforehand.Photographing usually takes 1–3 days depending on the scope of the project. I always aim to photograph Monday through Wednesday and edit on Thursday. By scheduling my time this way, I can keep everything organized and running smoothly. If I feel a shoot will go over the 3 days I dedicate to photographing, I'll let the client know beforehand so they're not left wondering where their images are.I take my time when I'm photographing so that no detail is overlooked, even if that means carefully placing sprinkles by hand. If I need to, I'll also create props for a shoot. Check out this post for my photo tips and this post for all my styling hacks!
4. Edit!
Once it's time to edit, I place all my files in Adobe Bridge and will go through and rate the best photos. I batch edit all the photos from the same shoot to ensure consistency amongst all the images. I always photograph in RAW so my photos have more data, which gives me more control over the colors, highlights, and shadows.Once the batch processing is finished, I start the individual edits in Photoshop. This is where I edit the background so it's a solid, even tone throughout the whole photo. I also may go in and slightly adjust the placement of objects if they look a bit off. I always aim to keep my editing minimal and true to the original photograph. By capturing my image correctly the first time, I'm able to quickly turn around my photos once I start the editing process.Thursdays are my edit days, and unless I'm unusually busy, I always finish all my edits that day. If you'd like to learn more about how I manage my time, there's a post here for that!
5. The final hand-off
Once I go through a final review, I hand off the low-res photos to the client. I allow a round of minor revisions, if they have any color tweaks they prefer. I am very thorough in my final review process and include the client every step of the way.Once they approve, I send them the high-res files along with an invoice. I find it's important to invoice as soon as the work is complete so everything is still fresh in their mind. At this point, I also like to ask for any feedback or referrals. I currently do this via email, but I'm working on setting up a page for this so it's easier for the client.I've been working hard on tweaking and optimizing my client workflow that is easiest for my client, myself, and ensures the highest quality work. I hope this has shed some insight to my process and you are able to adapt these steps to help you and your clients as well! Be sure to check out the checklist above so you can always have my client workflow handy and guide you along!
How do you work with clients? Do you have a step-by-step process? I'd love to know in the comments!
Want more great tips? Join thousands of subscribers and receive monthly blog updates straight to your inbox!
[yikes-mailchimp form="1"]